4 Ways: Ultimate Guide to Fixing iPhone Boot Loop Issues

Table of Contents

Summary

This comprehensive guide offers effective solutions to fix iPhone boot loop issues. The article presents a detailed introduction and multiple step-by-step methods, including force restart, update or restore using Recovery Mode, and utilizing third-party tools to address the problem.

An iPhone boot loop, also known as a restart loop, occurs when the device repeatedly restarts without completing the normal boot-up process. This issue can be caused by various factors, such as software glitches, hardware malfunctions, or firmware corruption. It can be frustrating for iPhone users, especially when they are unable to access their data and applications. However, with the right guidance and a systematic approach, it is possible to resolve iPhone boot loop issues and get your device up and running again.

This guide provides a comprehensive analysis of various techniques to fix iPhone boot loop issues. It covers step-by-step instructions for each method and aims to cater to both novice and advanced users.

Method 1: Force Restart Your iPhone

The first and simplest method to fix an iPhone boot loop issue is by performing a force restart. This method can resolve minor software glitches that might be causing the loop. Step 1: Press and hold the power button (also known as the Side button) and the volume button simultaneously. For iPhone 8 or later, press and quickly release the volume up button, then the volume down button, and finally, press and hold the Side button until the Apple logo appears. Step 2: Continue holding both buttons until the Apple logo disappears and reappears. Step 3: Release the buttons when the Apple logo reappears. Your iPhone will restart and may function normally. If this method doesn’t work, proceed to the next one.

Method 2: Update or Restore Your iPhone using Recovery Mode

Recovery Mode is a built-in iPhone feature that can help you restore or update your device’s firmware. This method can fix more serious software issues, such as corrupted firmware, which could be causing the boot loop.

Step 1: Connect your iPhone to a computer using a Lightning cable.

Step 2: Launch iTunes (on a Mac with macOS Mojave 10.14 or earlier) or Finder (on a Mac with macOS Catalina 10.15 or later) or a Windows PC.

Step 3: Put your iPhone into Recovery Mode by following these steps:

– iPhone 8 or later: Press and quickly release the volume up button, then the volume down button, and finally, press and hold the Side button until the Recovery Mode screen appears.
– iPhone 7 or 7 Plus: Press and hold the Side button and the volume down button simultaneously until the Recovery Mode screen appears.
– iPhone 6s or earlier: Press and hold the Home button and the power button simultaneously until the Recovery Mode screen appears.

Step 4: A pop-up window will appear on your computer, providing options to update or restore your iPhone. Select “Update” to reinstall iOS without erasing your data.

Step 5: If the update doesn’t work, follow the steps again and choose “Restore” instead. This will erase all data on your iPhone and install the latest iOS version.

Note: Restoring your iPhone will erase all data, so make sure you have a recent backup before proceeding.

Method 3: Utilize ZOOZOZ iPhone System Recovery to Fix iPhone Boot Loop

ZOOZOZ iPhone System Recovery is a reliable third-party tool designed to address iPhone boot loop issues and other iOS system problems. This software can help you fix the issue without the risk of losing your data.

Step 1: Download and install ZOOZOZ iPhone System Recovery on your computer from the official website.

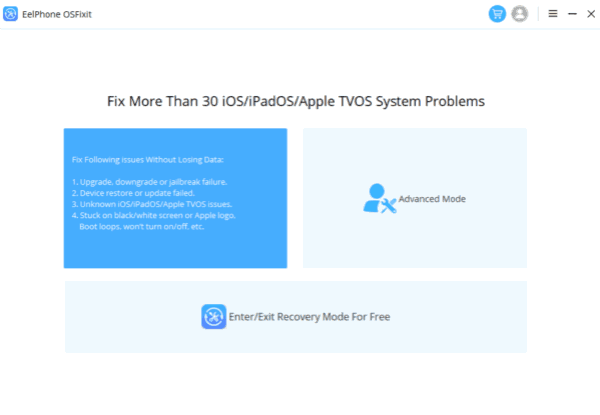
Step 2: On the main interface, select the “Standard Mode” option. This mode attempts to fix your iPhone boot loop issue without erasing any data.

iphone system recovery

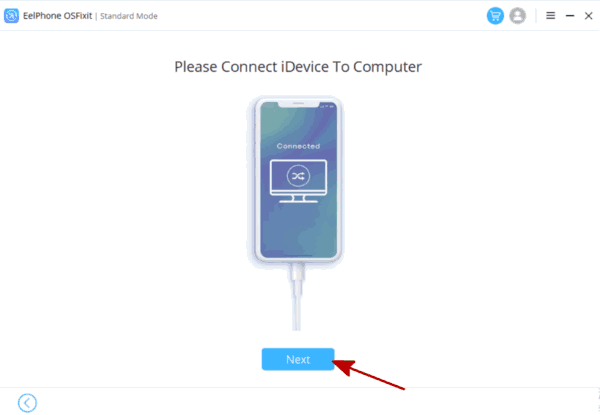
Step 3: Launch the software and connect your iPhone to your computer using a Lightning cable.

iPhone System Recovery

Step 4: ZOOZOZ iPhone System Recovery will detect your iPhone model and display the appropriate firmware version. Click “Download” to acquire the firmware package.

iPhone System Recovery

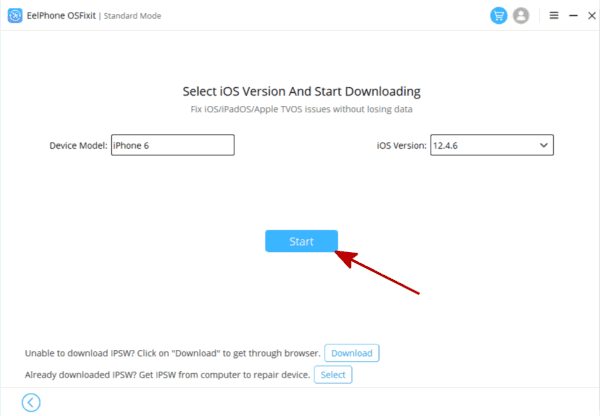
Step 5: Once the firmware is downloaded, click “Start” to initiate the repair process. The software will automatically fix your iPhone boot loop issue.

iPhone System Recovery

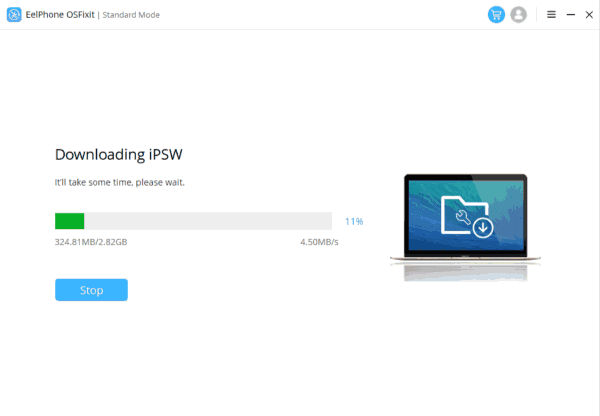
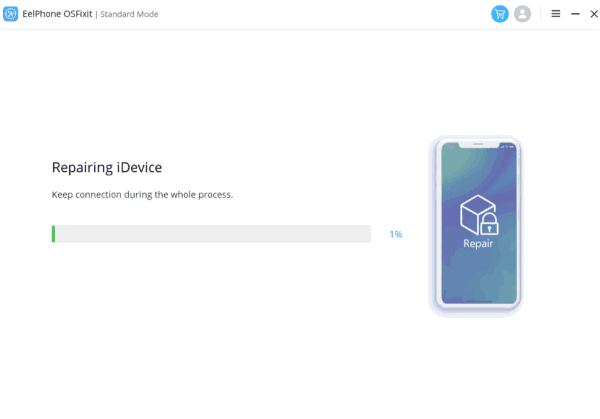
Step 6: Wait for the process to complete, which may take several minutes. Your iPhone should restart and function normally after the repair.

iPhone System Recovery

Note: If the “Standard Mode” doesn’t resolve the issue, you can try the “Advanced Mode” in ZOOZOZ iPhone System Recovery. However, be aware that this mode will erase all data on your iPhone, so ensure you have a recent backup before proceeding.

Method 4: Seek Professional Help from Apple Support

If none of the above methods work, it’s possible that your iPhone is experiencing a hardware issue, such as a faulty battery or malfunctioning components. In this case, seeking professional help from Apple Support is advisable.


Step 1: Visit the Apple Support website and navigate to the “Contact Us” section.


Step 2: Describe your issue to the support team, and they will provide guidance on the best course of action. In some cases, they may recommend visiting an authorized service provider or an Apple Store.


Step 3: Schedule an appointment with an Apple technician, who will diagnose the issue and recommend a repair or replacement solution.


Step 4: Follow the technician’s advice and have your iPhone repaired or replaced as needed.

Conclusion:

iPhone boot loop issues can be annoying and stressful, but they are often fixable with the right approach. By following the methods outlined in this guide, you can effectively troubleshoot and resolve the problem. It is essential to maintain regular backups of your iPhone data, so you can quickly restore your device in case of a boot loop or other system issues. Remember, if you’ve exhausted all other options and your iPhone still doesn’t function properly, seeking professional help from Apple Support is your best bet. They have the expertise and resources to diagnose and fix your device, ensuring you get back to enjoying your iPhone in no time.

Hot Articles